 Lekker Sun
Chapter 2 of 12
Setting up the site and saving the project
Every design starts with the site's location. It tells Lekker Sun where the sun is at every hour of the year and which weather to use, and nothing can be drawn until it's set.
All chapters
Start a new project
Click New design on your dashboard, or File → New project in the designer's top bar. A new project starts empty: no buildings, equipment or bill of materials.
Give it a name in the box beside the logo in the top bar. In our example it's "Sample home". The name shows on the report and in your project list.
Find the house on the map
Start typing the address in the search box of the Site card and pick it from the suggestions (or press Enter). The map moves to that area. The search only gets you close: it doesn't set the location. If you're standing at the site, the target button on the left of the map jumps to your own location instead.
Zoom right in until you can see the roof clearly. If the picture is blurry or old, try another satellite picture from the layers button at the top right of the map.
Set the project location
- Click the middle of the site on the map. A pin drops there; drag it if it isn't quite right, or click another spot.
- Press Set project location here on the map.
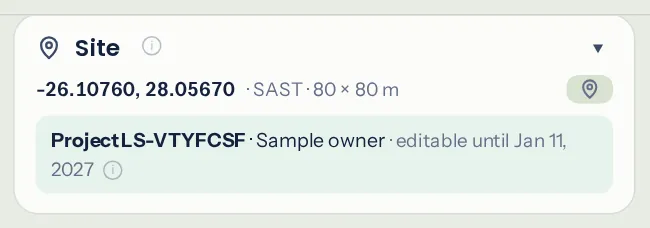
The coordinates appear in the Site card, with the time zone worked out from them. To move the location later, click ✎ next to the coordinates, then click the new spot and confirm it the same way. Anything you've already drawn stays where it is on the map; only the project area moves.
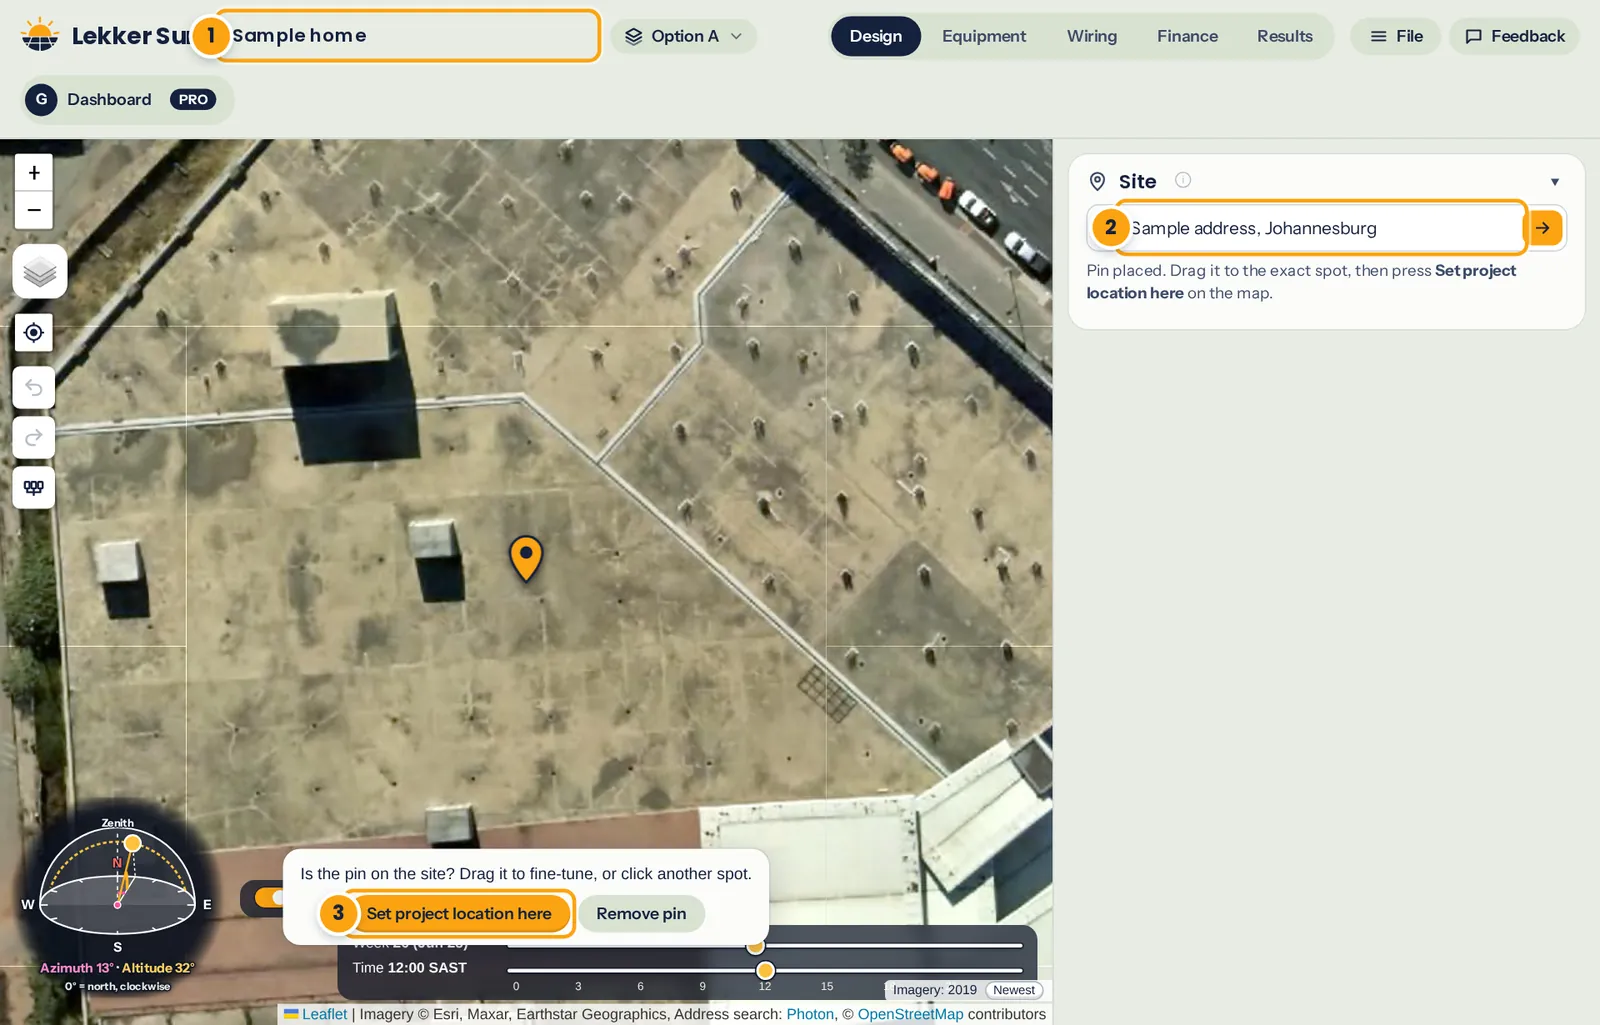
- Project name.
- Type the address and pick it from the suggestions: the map moves to the area.
- Then click the site itself on the map and press Set project location here.
The project area
Once the location is set, a dashed square shows the project area around it. The main buildings and the panels have to fit inside it. Things that only cast shade (neighbouring buildings, trees, chimneys and poles) can also stand in the lighter band up to 25 m outside it. How big the square is depends on your plan; the sizes are on the pricing page.
For most houses the smallest area is plenty. The bigger areas help on farms, schools and larger properties, or when a tall building some distance away shades the roof in winter.
Save the project
A project is one site. Saving it (File → Save project, or Ctrl+S) gives it a project ID, lets the report print without the watermark, with the project ID and address on every page, and unlocks the wiring diagram and the roof heatmap for that site. Save once you've checked the location is right, because it locks.
- Choose File → Save project.
- Check the project name, and add the owner's name (optional) and the site address.
- Check the coordinates shown are on the right house, then click Save and use 1 slot.
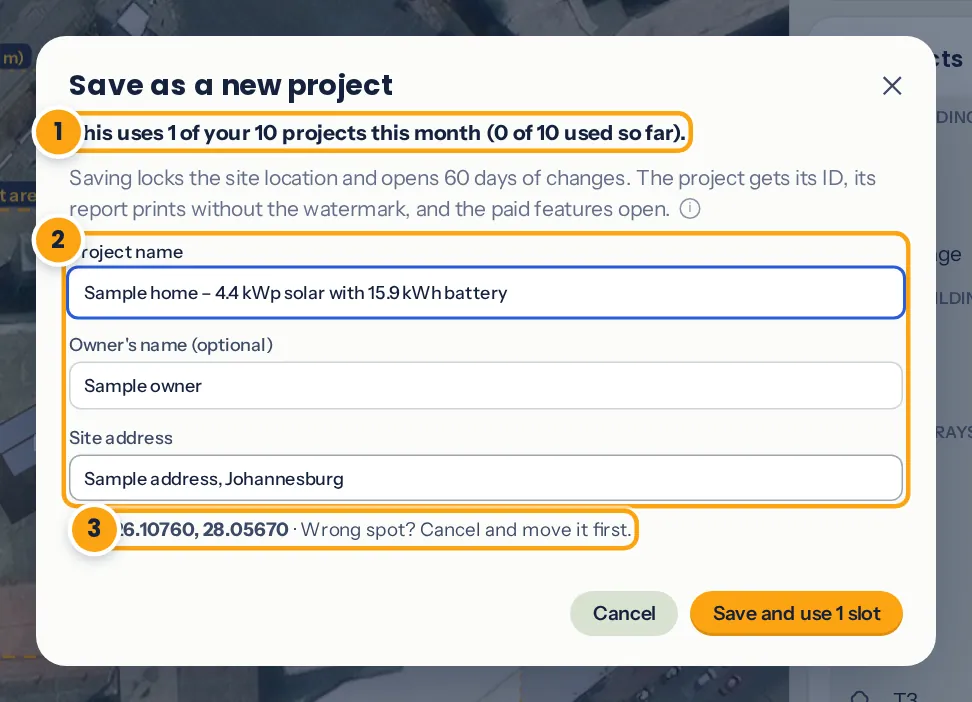
- How many of this month's projects you've used.
- Project name, owner's name and site address. They appear on the report.
- The location that will be locked: check it before you save.
Once saved:
- The site location is fixed. For another site, start a new project.
- You can change the design for 60 days, and every save after the first just saves. After that the last saved version still prints.
- The first save uses one of your plan's projects for the month, or a bought project if those are used up or your plan has none.
Buying projects
Projects are bought in bundles of 1, 5 or 10 (the price per project is on the pricing page), and last 12 months. Buy them on your dashboard under Account, then Projects. If you save a project with none left, the designer offers to buy one there and then.
Some plans include projects every month (the pricing page shows which, and how many), which start again on the 1st. Unused ones don't carry over. Bought projects are only used once the month's are used up.