 Lekker Sun
Chapter 3 of 12
Drawing buildings, trees and chimneys
The shading results are only as good as the model. In this chapter you draw the roofs the system is for and everything that can throw a shadow on them: the buildings next door, trees and chimneys.
All chapters
Add the house
- On the Design tab, open + Add in the Objects card and choose Building.
- Drag the building over the house on the satellite picture.
- Pull the handles to match the walls, and use the rotate handle to turn it.
- Fine-tune the numbers in the settings that open below the object list.
Click an object on the map or in the list to select it, and click an empty part of the map to deselect it. Shadows are redrawn when you let go of the mouse.
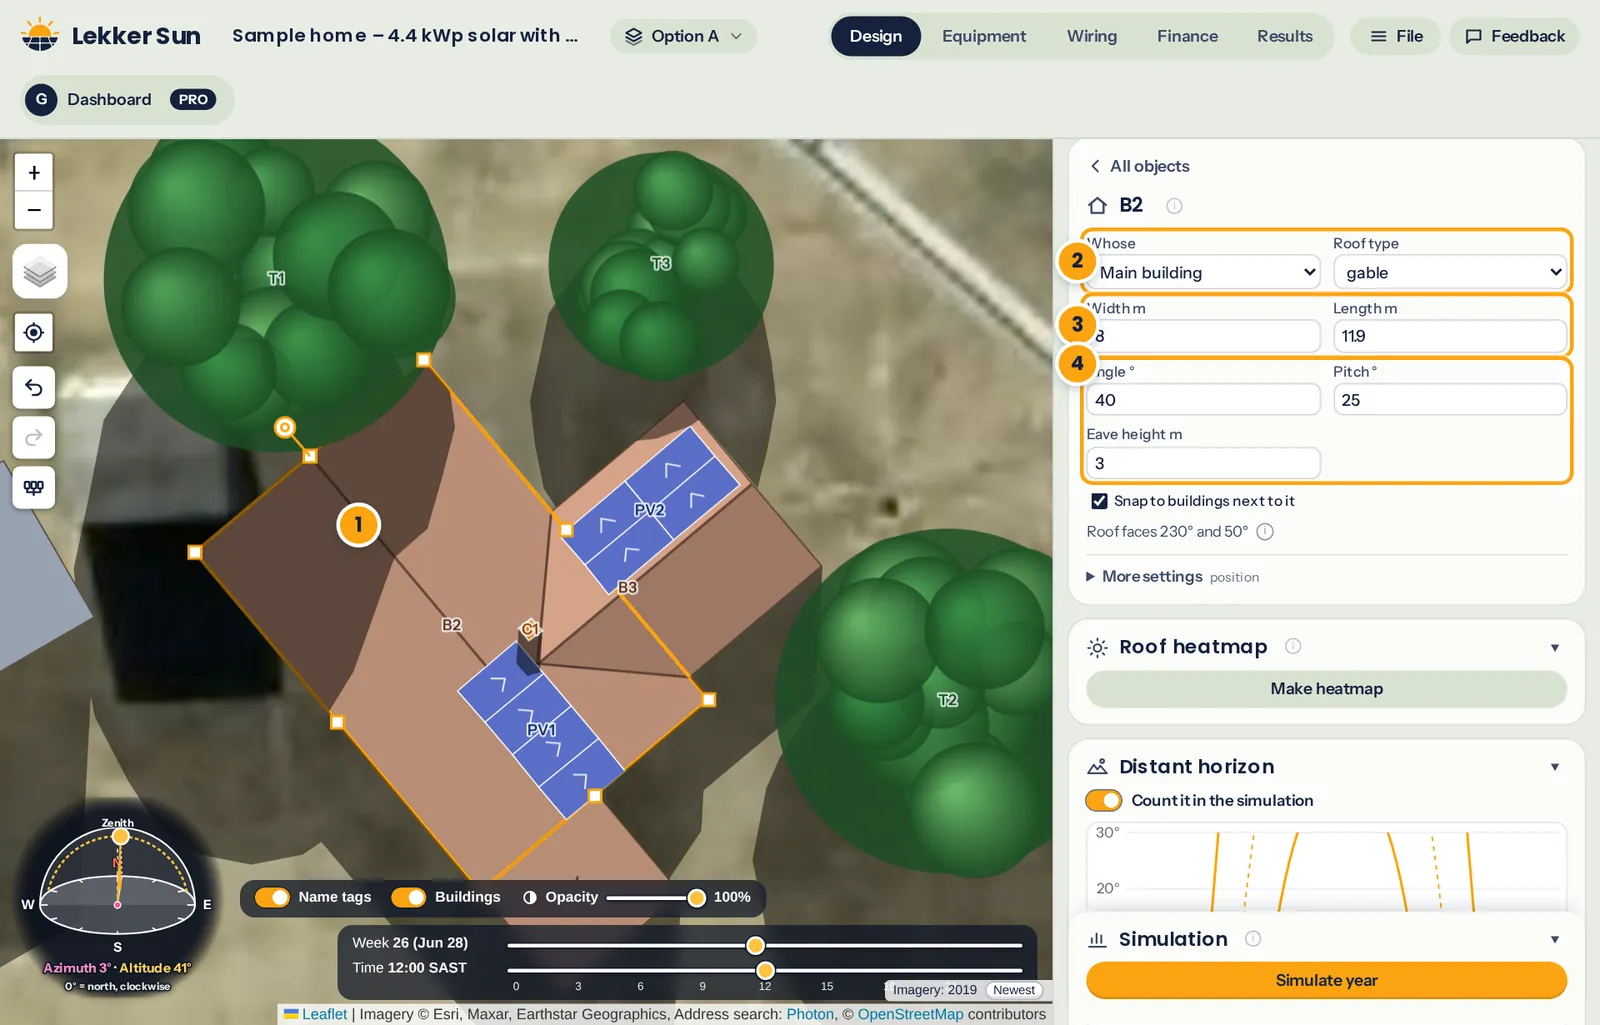
- The selected building, with its handles.
- Whose (Main building, the one the system is for, or a surrounding one) and the roof type.
- Size: width and length are the outside walls.
- Rotation (angle), roof pitch and eave height.
Set the roof
- Roof type: flat, gable, hip or shed (a single slope).
- Pitch: the roof angle in degrees. Tiled roofs are typically 17° to 30°; IBR and corrugated sheeting is often 5° to 15°.
- Eave height: the height of the walls up to the gutter, in metres. Around 2.7 to 3 m for a single storey and 5.5 to 6 m for a double.
Under the settings, the Roof faces line tells you which compass directions the roof faces point to. Use it to check the ridge runs the right way, and turn the building with Angle if it doesn't.
Tip: measure on the satellite view. Line a building's edges up with the walls in the picture, not the edge of the roof's shadow. Shadows from a low sun can make a roof look much bigger than it is.
Main buildings and surrounding buildings
Every building is either a main building (the one the system is for) or a surrounding building. Both throw shadows. The difference:
- Main buildings' roofs can carry arrays and are scored by the roof heatmap.
- Surrounding buildings have a grey roof and are there only for their shade. Draw the neighbour's double storey, a tall boundary wall, a water tank stand: anything that can block the sun.
L-shapes and joined roofs
Many houses are an L, a T or a main roof with a garage alongside. Draw each part as its own building. With Snap to buildings next to it ticked (the default), a building you drag clicks into place against its neighbour: walls touch, ends line up and corners meet, so there are no gaps for light to leak through. A corner also catches onto any wall of a building next to it, and onto the ridge line of a gable or hip roof, even when the two buildings sit at different angles. Zoom in for finer placement: the snap reaches less far the closer you zoom.
In our example the house is two gable roofs at right angles plus a garage, which is three buildings.
Planned: advanced roofs. Gable roofs whose two sides have different pitches or widths, and roofs with notches and cut-outs, drawn as one building. Until then, build them from several buildings as above.
Add trees
Trees are often the biggest shading problem on a South African roof, especially in winter when the sun is low and shadows are long.
- Choose + Add → Tree and drag it so the centre sits on the trunk, not the middle of the crown.
- Pick the shape that fits: round, columnar, conifer, spreading or palm.
- Set the Crown radius, Total height and Trunk height (up to the lowest big branches).
- Set Density: how much of the light the leaves stop. A dense evergreen is high; an open tree, or one that loses its leaves in winter, is lower. The trunk and branches still shade, so don't set a deciduous tree to zero.
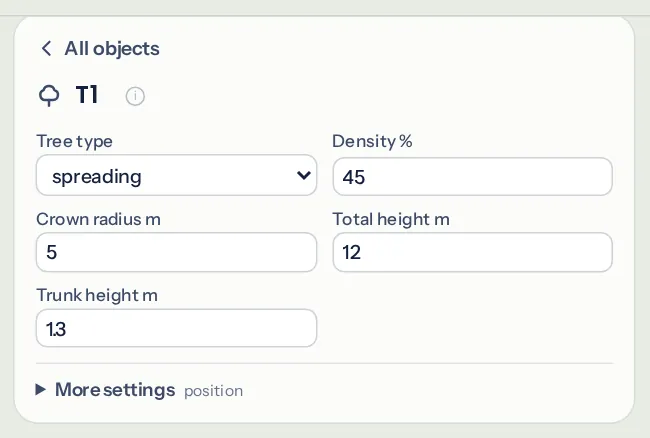
Model the tree at the size it will be in a few years, not just today. More on this in the guide to trees and solar shading.
Chimneys, poles and other small objects
+ Add → Chimney / pole covers chimneys, vent pipes, satellite dishes, geyser stacks and light poles. Choose a round or square shape, set its width and its height above where it stands. On a roof that's the height above the roof surface, not the ground. Tick Line up with the roof under it to turn a square chimney square to the roof.
Working with the object list
- Click a row to select the object, or click right on its name to rename it. The buttons on a row show when you point at it.
- The eye hides an object. Hidden objects don't shade anything, which is a quick way to see what a tree costs.
- The copy button duplicates an object. Ctrl+C and Ctrl+V copy and paste the selected one. A copied array goes beside the original, on the same roof face where there's room.
- The cross deletes it. Delete on the keyboard does the same for the selected object; press Enter to confirm.
- On the map, a click picks what's on top: a tree, chimney or array before the roof under it, and the highest roof where two buildings overlap. Click the same spot again to pick the one underneath.
A project can have up to 150 objects. Once a design gets close to the limits, a Size bar appears under the list. Size grows with the number of panels and shading objects; if it gets near the limit, remove trees or buildings too far away to reach the roof.
Check the shadows through the year
The Week and Time sliders under the map move the sun, and the shadows follow. The small sun dome in the corner shows where the sun is in the sky.
For a winter design, look at mid-June (week 25 or 26) at 9:00, 12:00 and 15:00. That's when shadows are longest. If a tree or the neighbour's house covers part of the roof at those times, the panels shouldn't go there. The heatmap in the next chapter shows the same thing over the whole season, in one picture.
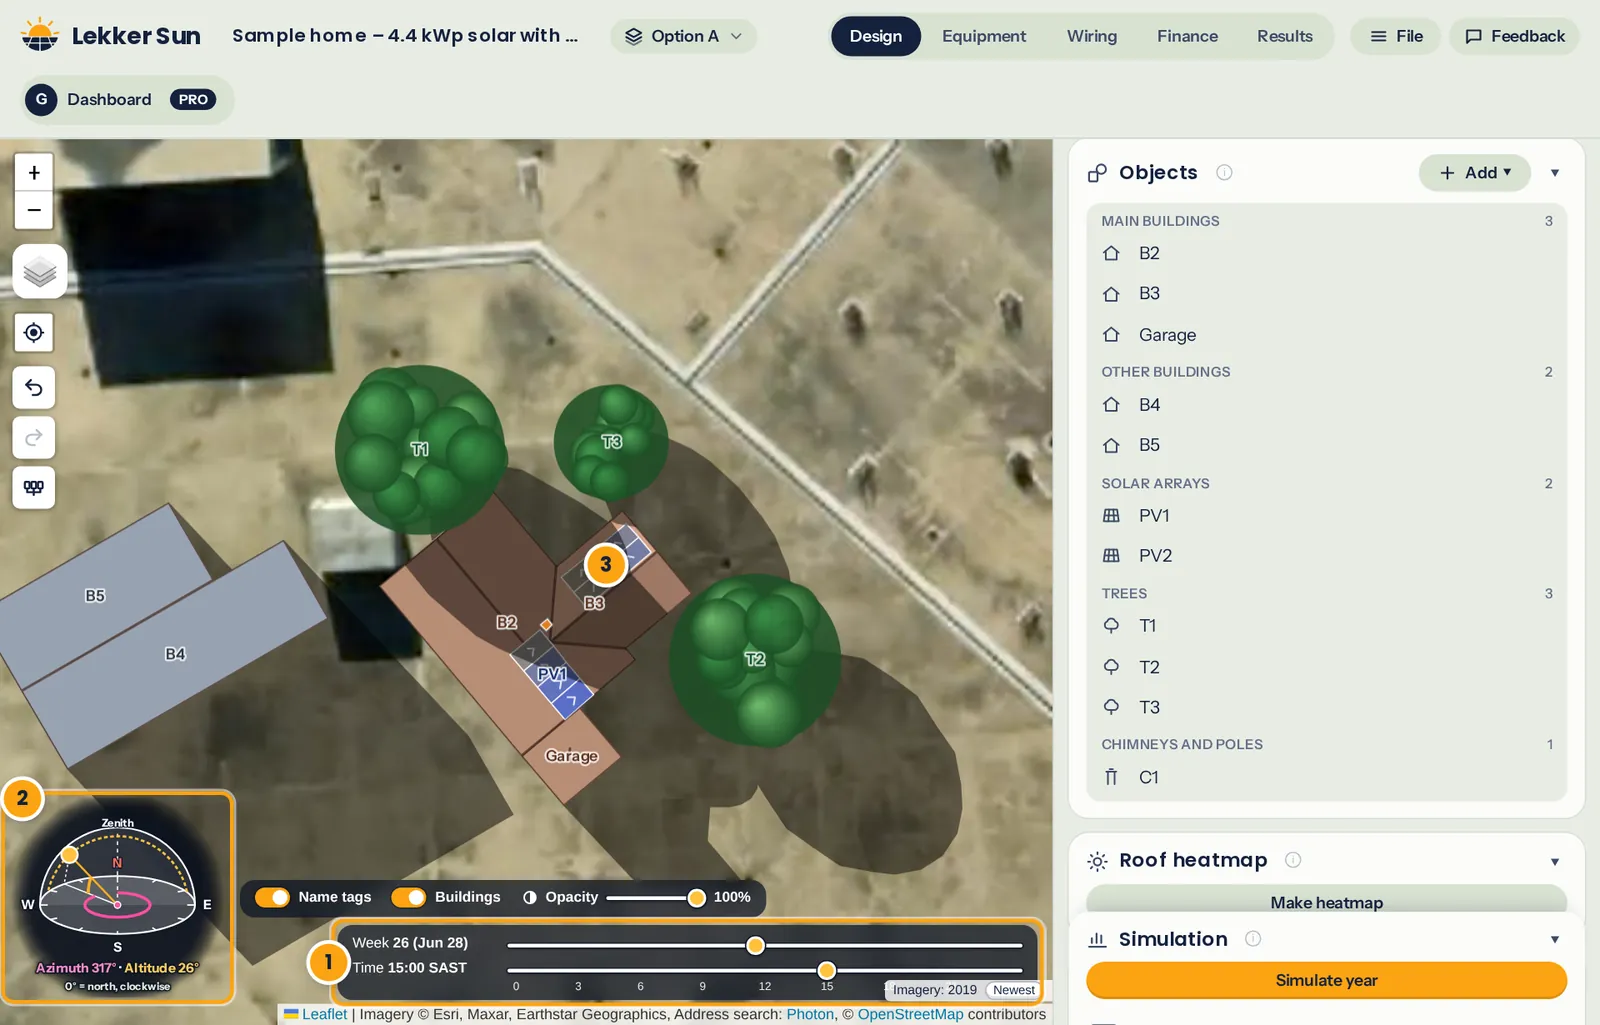
- Week and time: here, late June at 15:00.
- The sun's position in the sky: low in the north-west.
- The big tree's shadow reaching the back wing's roof.
Above the sliders, Name tags shows or hides the objects' names, and Buildings shows or hides the buildings. The slider beside it fades them, so you can line them up with the satellite picture underneath. Faded or hidden, the buildings still cast their shadows and count in every calculation.