 Lekker Sun
Chapter 1 of 12
Getting started with Lekker Sun
Lekker Sun runs in the browser, so there's nothing to install. This chapter covers opening the designer, setting up an account, and where everything sits on screen.
All chapters
What each plan includes
The designer itself is free: shading, compatibility checks and production all work without paying (the Finance page shows a sample until the project is saved, or on Pro), and your projects are kept in your browser (export them as files to keep them safe). To print a client report without the watermark, you save the project (see the price per project).
Some features are not on every plan. They include:
- Projects every month, saved to your account
- No ads
- Your own report and wiring diagram before you save the project
- The roof heatmap, the distant horizon and bypass diodes in the shading
- A bigger project area
- VAT on prices and proposals, and your logo and contact details on reports
Which plan includes what, with prices and sizes, is on the pricing page. A bought project can also unlock some of these for that one site, even on the free plan.
Open the designer
Go to lekkersun.tech/designer. If you're not signed in, a welcome window asks how you want to carry on.
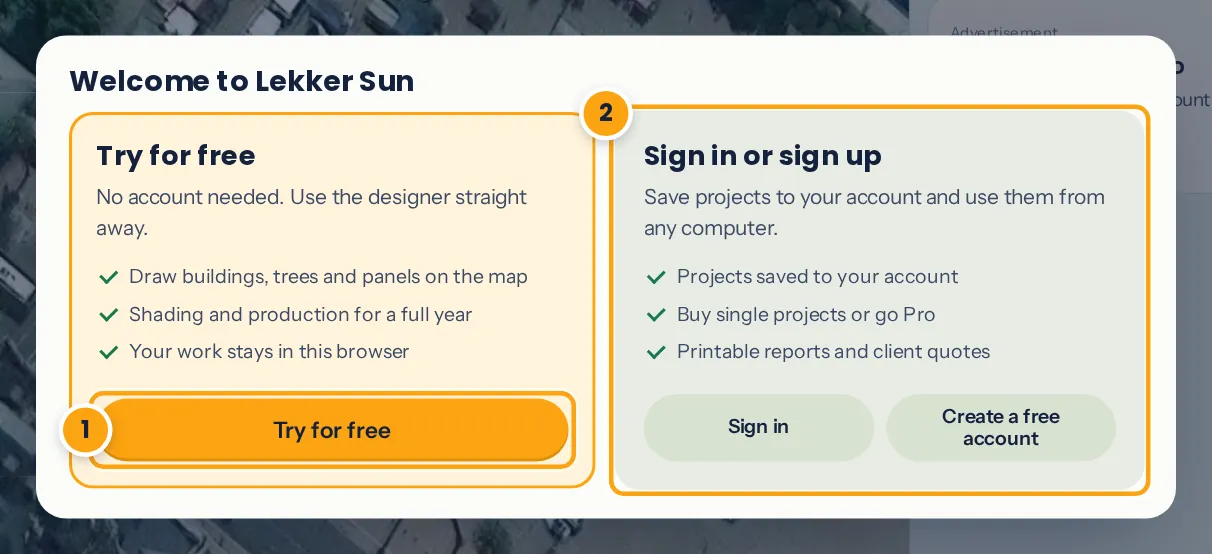
- Try for free: a small window asks you to tick the box to accept the terms and privacy policy, then you carry on without an account.
- Or sign in, or create a free account.
Without an account, your project lives in this browser only. That's fine for trying things out, but clearing the browser's data clears the project too. Use File → Export project in the top bar to keep a copy.
Create an account
- Click Create a free account (in the designer's welcome window, or Sign in on the home page).
- Type your email address and a password of 8 or more characters, and accept the terms.
- We email you a 6-digit code. Type it in within 15 minutes, or click the link in the email from the same browser. Check your spam folder if it doesn't arrive.
Got an invite code? Type it in the Invite code box when you sign up, or later under Account.
Your dashboard
Signing in from the home page takes you to your dashboard. It has three tabs:
- Overview: projects used this month, bought projects left, open and accepted proposals, your latest projects and recent activity.
- Projects: every saved project, with client details and status. See chapter 11.
- Account: your plan, buying projects, branding, support access, password and your data.
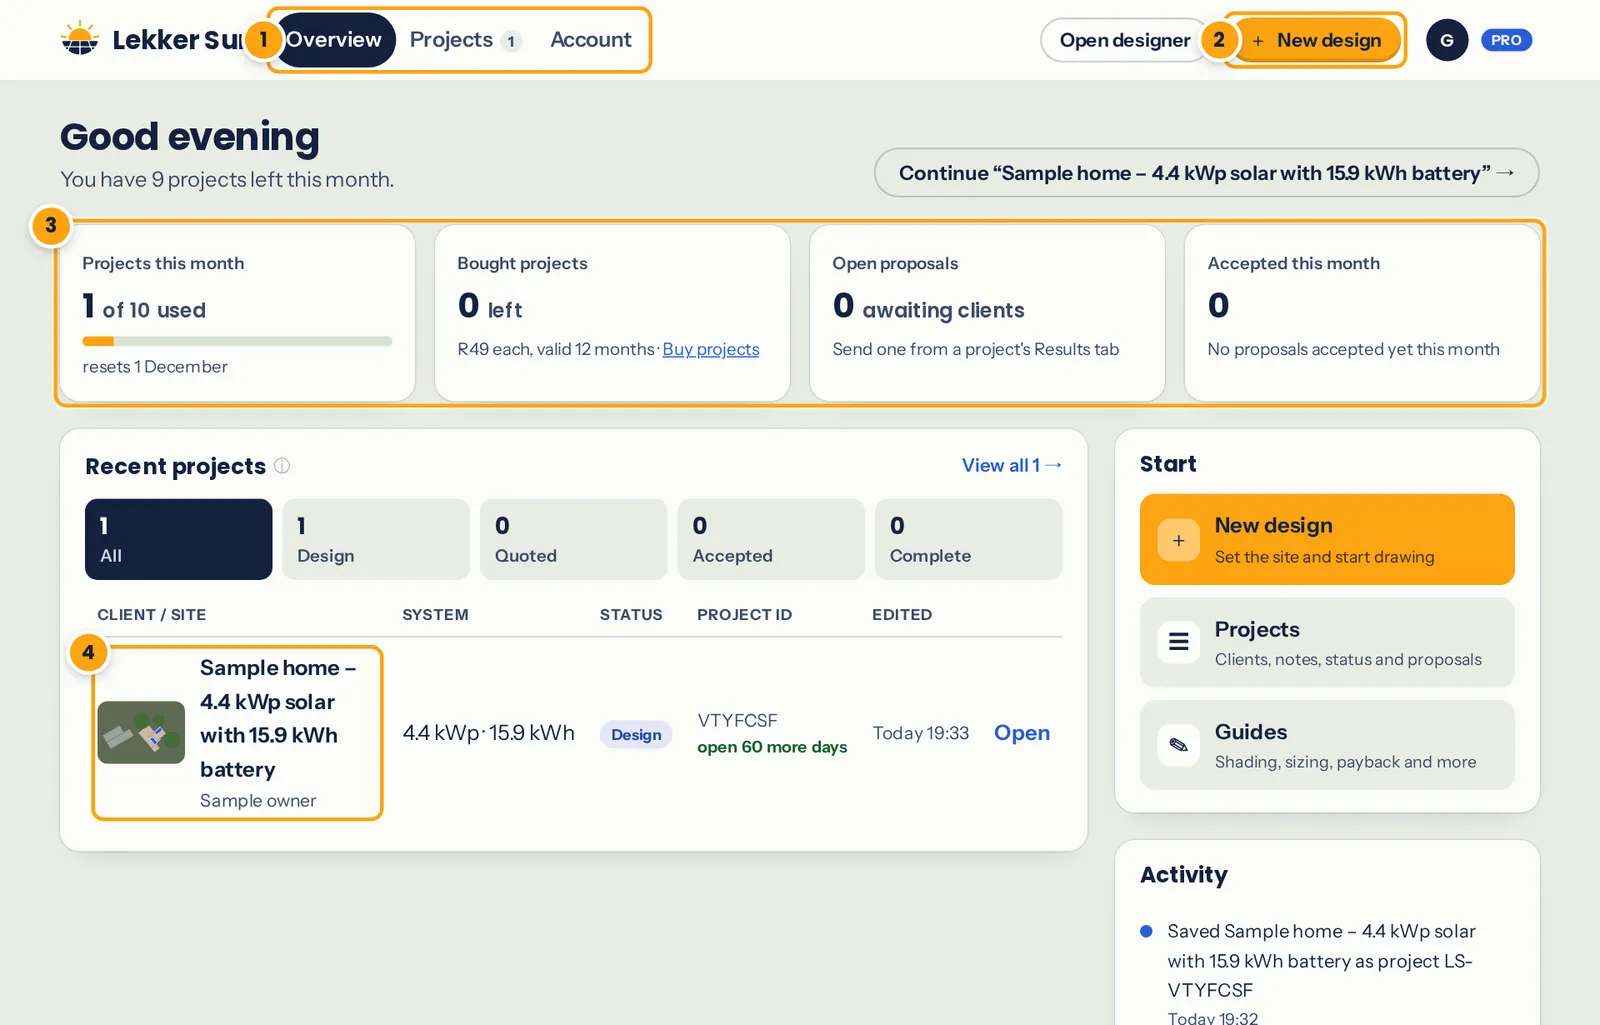
- Switch between Overview, Projects and Account.
- New design opens the designer with an empty project.
- This month at a glance: projects used, bought projects and proposals.
- Your latest projects. Open takes you straight back into the design.
Find your way around the designer
The designer has five tabs along the top. You'll mostly work left to right, though you can move between them at any time:
- Equipment: panels, inverters and batteries, the compatibility checks and the bill of materials.
- Design: the satellite map, where you set the site and draw roofs, trees and arrays. The heatmap and the yearly simulation live here too.
- Wiring: the single-line diagram, drawn from your design.
- Finance: consumption, tariff, export and the savings calculation.
- Report: the client report and the proposal.
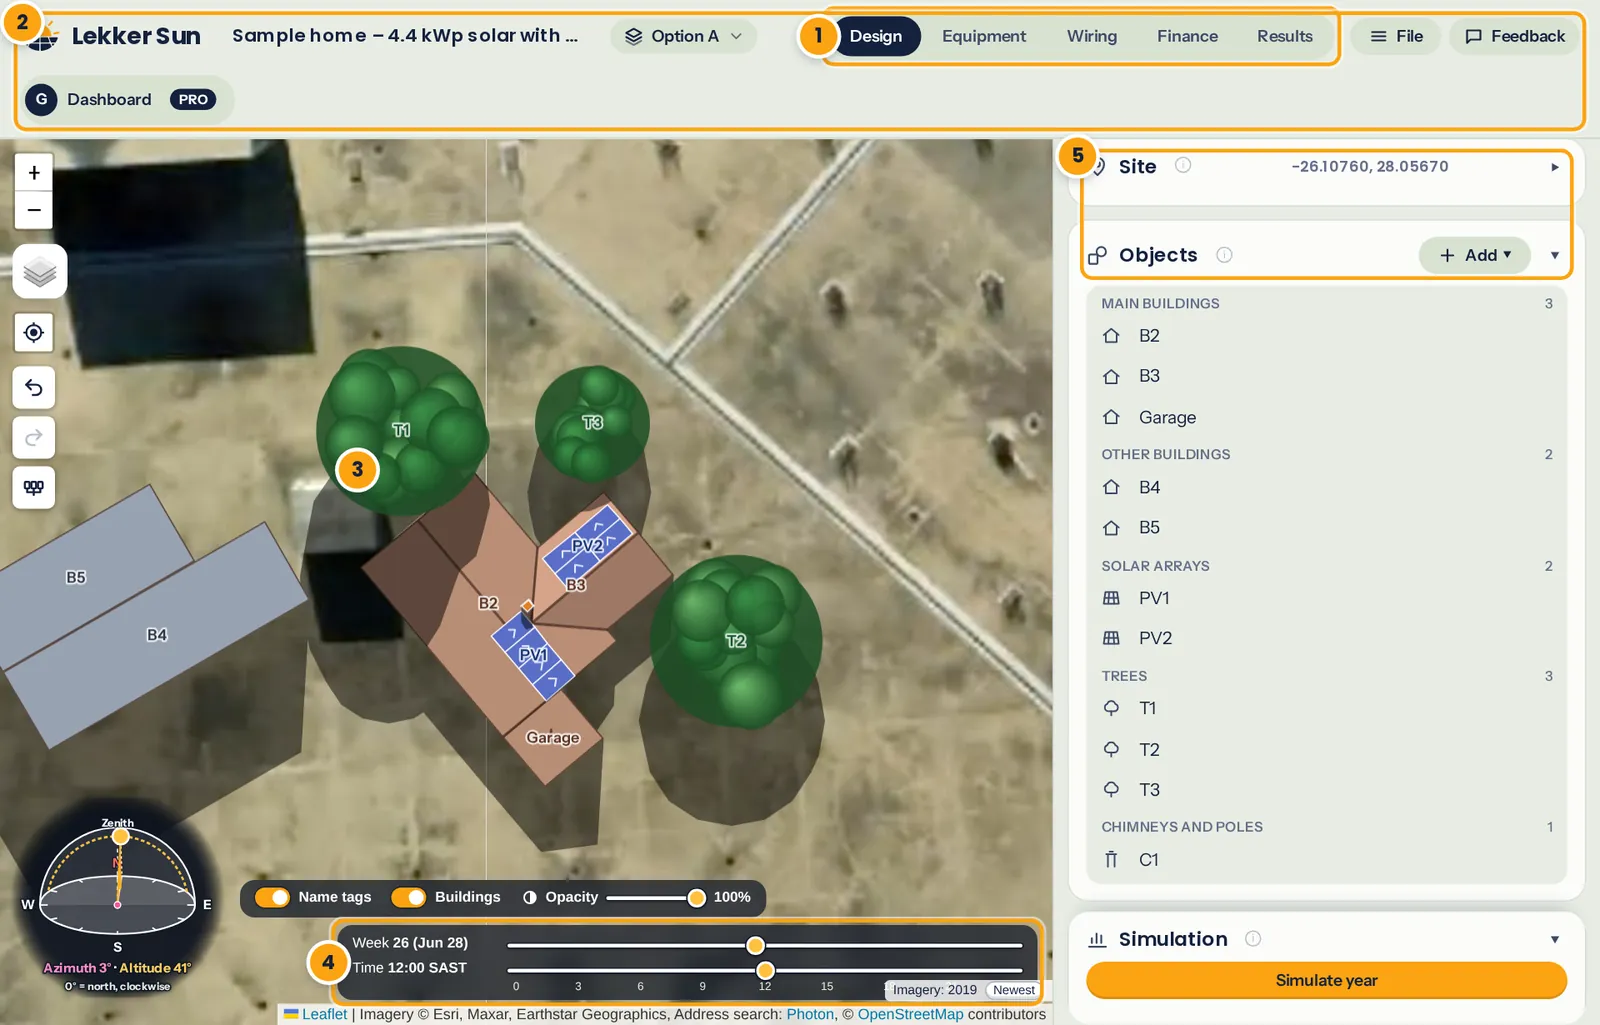
- The five pages, starting with Design.
- The File menu (new, save, load, import and export projects, the guide and feedback) and Dashboard once you're signed in.
- The map. Scroll to zoom, drag to pan, and use the layers button for a different satellite picture.
- Week and time sliders: the shadows on the map follow them.
- The cards: Site, Objects, Roof heatmap and Simulation. Each appears once you can use it, and ▾ folds it away.
Tip: Ctrl+Z undoes and Ctrl+Y redoes on the Design tab. The arrows at the top of the map do the same.
Spotted a problem or have an idea? The Feedback button in the designer's top bar sends it straight to us, with a picture of the map if you like.